WordPress is the most popular CMS (content management system), which allows you to create beautiful websites and blogs as easily as ABC. It allows you to manage pages and posts in the web front-end, and over 39.5% of all the websites on the Internet are using WordPress.
In this post, I’ll guide you on how to set up a WordPress on a LEMP stack (Linux, Nginx, MySQL, and PHP) on an Ubuntu 18.04 server.
Prerequisites:
- Ensure that you have access to an Ubuntu 18.04 server.
- A domain name pointing to your server’s IP address.
Table of Contents
Step 1: Installing Nginx Web Server
In this post, we are going to use the Nginx server. Let’s install Nginx by using :
$ sudo apt update
$ sudo apt install nginx
Type sudo nginx -v to check the version of Nginx installed on your server.
Let’s configure the firewall now. If you don’t want to use a firewall, you can skip below and jump to Step 2.
Enable the firewall by typing :
$ sudo ufw enableYou can check available profiles under the firewall by using:
$ sudo ufw app listThe output will be:
Output
Available applications:
  OpenSSH
  Nginx HTTP
  Nginx HTTPS
  Ngins Full
Note: Execute the command below for the firewall to allow ssh connections, so that we can log in back using ssh.
$ sudo ufw allow 'OpenSSH'Let’s set up the firewall to allow connections to Nginx. Enable this by typing:
$ sudo ufw allow 'Nginx Full'Note: If you don’t want to configure SSL to your server, then, you can just allow only ‘Nginx HTTP’. A tutorial on how to configure SSL will be available below in this blog.
You can verify the change by running:
$ sudo ufw statusThis command’s output will show that HTTP and HTTPS traffic(Nginx Full) is allowed:
Output
Status: active

To                        Action      From
--                        ------      ----
OpenSSH                    ALLOW      Anywhere
Nginx Full                ALLOW      Anywhere
OpenSSH (v6)              ALLOW      Anywhere (v6)
Nginx Full (v6)            ALLOW      Anywhere (v6)
With the new firewall rule added, you can test if the server is running by accessing your server’s domain name in your web browser.

If you see the above page, you have successfully installed Nginx on your server.
Step 2: Installing MySQL
Let’s install MySQL to store and manage the data on our site.
Install MySQL by typing:
$ sudo apt install mysql-serverMySQL is now installed.
To secure the installation, MySQL comes with a script for modifying some insecure defaults. Initiate the script by typing:
$ sudo mysql_secure_installationThis script will ask if you want to configure the VALIDATE PASSWORD PLUGIN.
If you don’t need to type No and proceed. If you want to configure validate password plugin, follow the below steps. After running the above command you will see this.
VALIDATE PASSWORD PLUGIN can be used to test passwords
and improve security. It checks the strength of password
and allows the users to set only those passwords which are
secure enough. Would you like to setup VALIDATE PASSWORD plugin?

Press y|Y for Yes, any other key for No:
If you’ve enabled validation, the script will also ask you to select a level of password validation.
Note: Whatever you select(say it low, medium, or strong) MySQL won’t allow password which doesn’t match their password validation criteria.
LOW    Length >= 8
MEDIUM Length >= 8, numeric, mixed case, and special characters
STRONG Length >= 8, numeric, mixed case, special characters and dictionary                  file

Please enter 0 = LOW, 1 = MEDIUM and 2 = STRONG: 1
Next, you’ll be asked to submit and confirm a root password:
Please set the password for root here.

New password:

Re-enter new password:
For the rest of the questions, you should press Y and hit the ENTER key at each prompt. This will remove some anonymous users and the test database, disable remote root logins, and load these new rules so that MySQL immediately respects the changes we have made.
By default, MySQL server authenticates the root users via auth_socket rather than by password. If we allow auth_socket authentication, it will cause some problems in configuring external software like PHPMyAdmin.
So to make MySQL user to authenticate using passwords, follow these steps:
$ sudo mysqlNext, to check the authentication method of your MySQL user accounts use the following command:
mysql> SELECT user,authentication_string,plugin,host FROM mysql.user;Output
+------------------+-------------------------------------------+-----------------------+-----------+
| user | authentication_string | plugin | host |
+------------------+-------------------------------------------+-----------------------+-----------+
| root | | auth_socket | localhost |
| mysql.session | *THISISNOTAVALIDPASSWORDTHATCANBEUSEDHERE | mysql_native_password | localhost |
| mysql.sys | *THISISNOTAVALIDPASSWORDTHATCANBEUSEDHERE | mysql_native_password | localhost |
| debian-sys-maint | *CC344277A401A34343545546DFDFSFDDFDS876FF | mysql_native_password | localhost |
+------------------+-------------------------------------------+-----------------------+-----------+
4 rows in set (0.00 sec)In this example, you can see that the root user authenticates using the auth_socket plugin. To configure the root account to authenticate with a password, run the following command. Be sure to change your password to a strong password :
mysql> ALTER USER 'root'@'localhost' IDENTIFIED WITH mysql_native_password BY 'password';
mysql> FLUSH PRIVILEGES;
Check the authentication methods employed by each of your users again to confirm that the root no longer authenticates using the auth_socket plugin:
mysql> SELECT user,authentication_string,plugin,host FROM mysql.user;Output
+------------------+-------------------------------------------+-----------------------+-----------+
| user | authentication_string | plugin | host |
+------------------+-------------------------------------------+-----------------------+-----------+
| root | *3636KLDFFKDLSETETRERLKFLDK39F92C1571D6D78F | mysql_native_password | localhost |
| mysql.session | *THISISNOTAVALIDPASSWORDTHATCANBEUSEDHERE | mysql_native_password | localhost |
| mysql.sys | *THISISNOTAVALIDPASSWORDTHATCANBEUSEDHERE | mysql_native_password | localhost |
| debian-sys-maint | *CC744277A401A7D25BE1CA89AFF17BF607F876FF | mysql_native_password | localhost |
+------------------+-------------------------------------------+-----------------------+-----------+
4 rows in set (0.00 sec)You can see in this example output that the root user is now authenticated using a password. Once you confirm this on your own server, you can exit the MySQL shell:
mysql> exit;Step 3: Installing PHP
We need to install php-fpm, which stands for “fast CGI process manager” to tell Nginx to pass PHP requests to this software for processing and additionally php-mysql package to communicate with DB.
$ sudo apt install php-fpm php-mysqlAnd that’s it, we have installed all the components of the LEMP stack.
Step 4: Configure the server to use PHP
Go to /etc/nginx/sites-available directory, create a new or open your server configuration file.
Note: You can use the default, but here I am using the server configuration file name mydomain.com
sudo nano /etc/nginx/sites-available/mydomain.comAdd the following to the server block file /etc/nginx/sites-available/mydomain.com
server {
        listen 80;
        root /var/www/html;
        index index.php index.html index.htm index.nginx-debian.html;
        server_name mydomain.com;

        location / {
                try_files $uri $uri/ =404;
        }

        location ~ \.php$ {
                include snippets/fastcgi-php.conf;
                fastcgi_pass unix:/var/run/php/php7.2-fpm.sock;
        }

        location ~ /\.ht {
                deny all;
        }
}
Save and exit once done. Link your server configuration file to the sites-enabled and unlink default from sites-enabled.
$ sudo ln -s /etc/nginx/sites-available/mydomain.com /etc/nginx/sites-enabled/
$ sudo unlink /etc/nginx/sites-enabled/default
Test your new configuration file by typing:
$ sudo nginx -tIf any errors are reported, go back and recheck your file before continuing. If there are no errors, reload Nginx to make the necessary changes:
$ sudo systemctl reload nginxStep 5: Installing WordPress
Let’s create a new MySQL Database and User for WordPress.
Login using root:
For auth_socket plugin:
$ sudo mysqlFor mysql_native_password plugin, run the below command, and enter the password:
$ mysql -u root -pLet’s create a new database for WordPress.
mysql> CREATE DATABASE wordpress DEFAULT CHARACTER SET utf8 COLLATE utf8_unicode_ci;Note: password should match your mysql’s password validator criteria.
Create a new user and give access for new user to WordPress database:
mysql> CREATE USER 'newuser'@'localhost' IDENTIFIED BY 'password';
mysql> GRANT ALL PRIVILEGES ON * . * TO 'newuser'@'localhost';
mysql> FLUSH PRIVILEGES;
mysql> exit;
Now, let’s install required packages for WordPress;
$ sudo apt update
$ sudo apt install  php-soap php-xml php-curl php-gd php-intl php-xmlrpc php-zip php-mbstring
Restart php-fpm for changes to reflect on the server
$ sudo systemctl restart php7.2-fpmNow, let’s configure our server configuration file.
Add these lines to your server configuration file /etc/nginx/sites-available/mydomain.com
Note: In the upcoming steps, we are going to install WordPress inside /var/www/wordpress. You can install anywhere, but make sure you have configured root in the server configuration file to point to the installed path.
Here in root, I am using /var/www/wordpress.
$ sudo nano /etc/nginx/sites-available/mydomain.comNow add these lines inside /etc/nginx/sites-available/mydomain.com:
server {
        listen 80;
        root /var/www/wordpress;
        index index.php index.html index.htm index.nginx-debian.html;
        server_name mydomain.com;

        location / {
              # try_files $uri $uri/ =404;
              try_files $uri $uri/ /index.php$is_args$args;
        }

        location ~ \.php$ {
                include snippets/fastcgi-php.conf;
                fastcgi_pass unix:/var/run/php/php7.2-fpm.sock;
        }

        location ~ /\.ht {
                deny all;
        }


    location = /favicon.ico { log_not_found off; access_log off; }
    location = /robots.txt { log_not_found off; access_log off; allow all; }
    location ~* \.(css|gif|ico|jpeg|jpg|js|png)$ {
        expires max;
        log_not_found off;
    }

}
When you are finished, save and close the file. Now, we can check our configuration for syntax errors by typing:
$ sudo nginx -tNext, let us download and set up WordPress. Follow the steps:
$ cd /tmp
$ curl -LO https://wordpress.org/latest.tar.gz
To extract the compressed file:
$ tar xzvf latest.tar.gzCopy wp-config-sample.php file to we-config.php:
$ cp /tmp/wordpress/wp-config-sample.php /tmp/wordpress/wp-config.phpMove the directory to the root (or your desired location). Make sure you mentioned your project dir under root in your server configuration file.
$ sudo cp -a /tmp/wordpress/. /var/www/wordpress
$ sudo chown -R www-data:www-data /var/www/wordpress
Now, let’s set up the WordPress configuration file.
For this, to get secret values from WordPress Secret Key Generator type:
$ curl -s https://api.wordpress.org/secret-key/1.1/salt/You will get unique values. Copy that and open the WordPress configuration file:
$ sudo nano /var/www/wordpress/wp-config.phpadd your copied secret keys to the relevant sections.
define('AUTH_KEY',        'VALUES COPIED FROM THE COMMAND LINE');
define('SECURE_AUTH_KEY',  'VALUES COPIED FROM THE COMMAND LINE');
define('LOGGED_IN_KEY',    'VALUES COPIED FROM THE COMMAND LINE');
define('NONCE_KEY',        'VALUES COPIED FROM THE COMMAND LINE');
define('AUTH_SALT',        'VALUES COPIED FROM THE COMMAND LINE');
define('SECURE_AUTH_SALT', 'VALUES COPIED FROM THE COMMAND LINE');
define('LOGGED_IN_SALT',  'VALUES COPIED FROM THE COMMAND LINE');
define('NONCE_SALT',      'VALUES COPIED FROM THE COMMAND LINE');
Configure your database:
define('DB_NAME', 'wordpress');

/** MySQL database username */
define('DB_USER', 'newuser');

/** MySQL database password */
define('DB_PASSWORD', 'password');

. . .

define('FS_METHOD', 'direct');
Save and close the file when done. Now go to http://your-domain.com . You can see this.
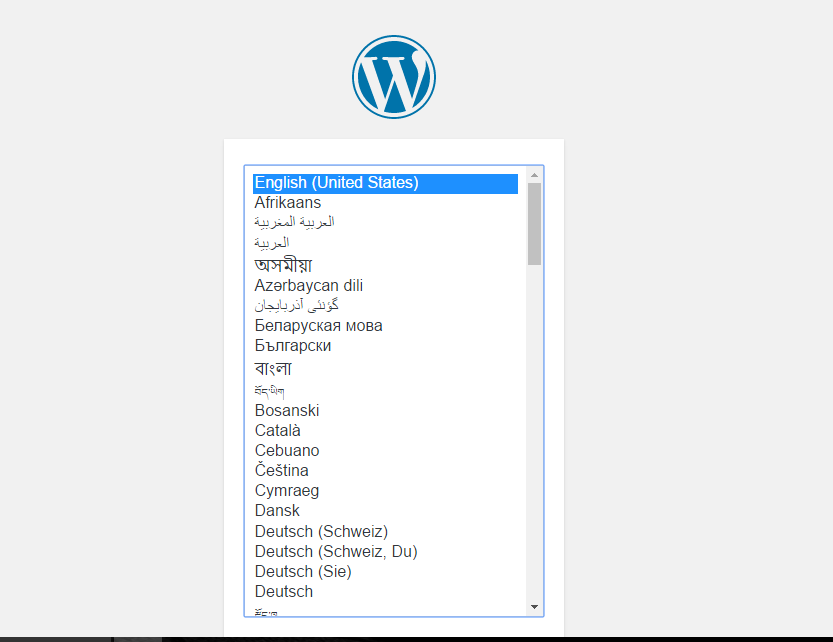
Now select your language and complete the installation process. After successful completion, you will see the dashboard.
Step 6: Configuring SSL (HTTP to HTTPS)
Let’s install certbot
$ sudo add-apt-repository ppa:certbot/certbotPress ENTER to accept.
Install Certbot’s Nginx package
$ sudo apt install python-certbot-nginxNow make sure you have allowed the firewall to accept Nginx HTTPS. If not please enable Nginx HTTPS.
You can check the configurations by:
$ sudo ufw statusOutput
Status: active
To Action From
-- ------ ----
OpenSSH ALLOW Anywhere
Nginx Full ALLOW Anywhere
OpenSSH (v6) ALLOW Anywhere (v6)
Nginx Full (v6) ALLOW Anywhere (v6)If you made any changes, don’t forget to reload ufw by
$ sudo ufw reloadTo obtain an SSL certificate:
$ sudo certbot --nginx -d mydomain.comYou have to enter your email address and agree to their terms of service. After that, it starts its verification. Once successful verification, certbot will ask to configure HTTPS settings. Select which you need and the configuration will be updated with a successful message like this
Output
IMPORTANT NOTES:
- Congratulations! Your certificate and chain have been saved at:
  /etc/letsencrypt/live/example.com/fullchain.pem
  Your key file has been saved at:
  /etc/letsencrypt/live/example.com/privkey.pem
  Your cert will expire on 2018-07-23. To obtain a new or tweaked
  version of this certificate in the future, simply run certbot again
  with the "certonly" option. To non-interactively renew *all* of
  your certificates, run "certbot renew"
- Your account credentials have been saved in your Certbot
  configuration directory at /etc/letsencrypt. You should make a
  secure backup of this folder now. This configuration directory will
  also contain certificates and private keys obtained by Certbot so
  making regular backups of this folder is ideal.
- If you like Certbot, please consider supporting our work by:

  Donating to ISRG / Let's Encrypt:  https://letsencrypt.org/donate
  Donating to EFF:                    https://eff.org/donate-le
Now try loading as https://your-domain.com in your web browser, It should be indicated that the site is secured.
To test the renewal process, you can do a run with certbot:
$ sudo certbot renew --dry-runCongratulations! You have successfully completed installing WordPress in your server secured with SSL.