To know more about lightsail or how to create amazon lightsail follow this blog
Table of Contents
How to create AWS EC2 (Ubuntu machine)?
Note: You can skip this part if you created an EC2 server already
Step 1: Create an AWS Account, and sign in. Open the Amazon EC2 console
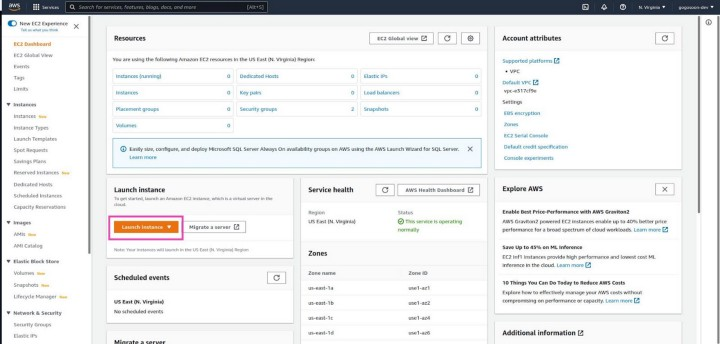
Step 2: Choose Launch Instance and select Launch Instance
Step 3: Enter the name of your instance. Under Application and OS Images (Amazon Machine Image), find an Ubuntu option and select
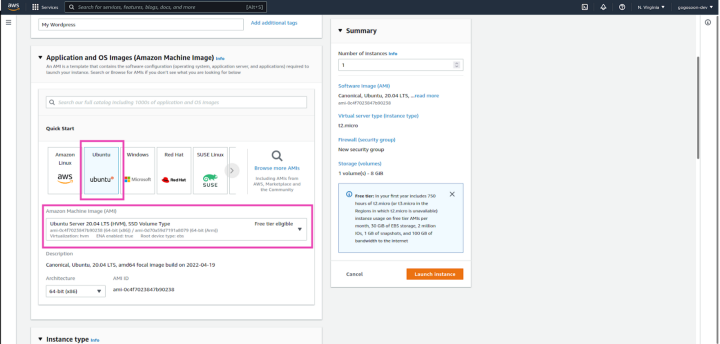
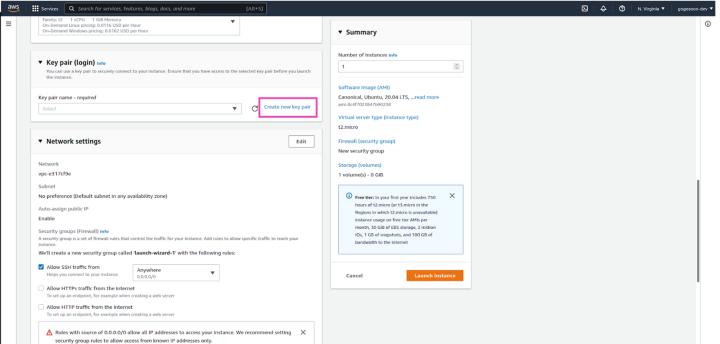
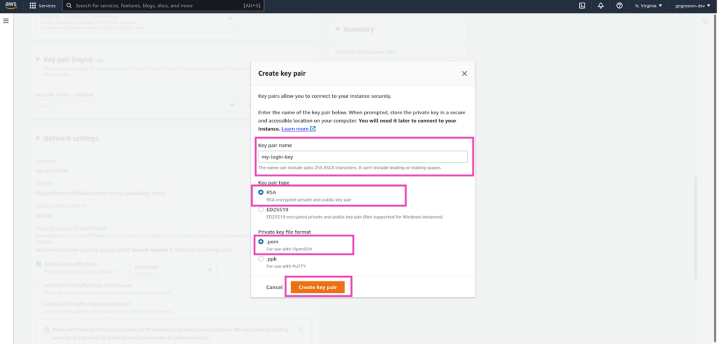
Step 4: In Instance type select as “t2.micro” (Select based on your need). Under “Key Pair” select Create new key pair.
- Enter the key pair name
- Select the key type as RSA
- Select the key file format as .pem
- Download the .pem file and keep it in a safe place.
Step 5: Under Network settings
- Check Allow HTTPS traffic from the internet
- Check Allow HTTP traffic from the internet
- Check Allow SSH traffic from

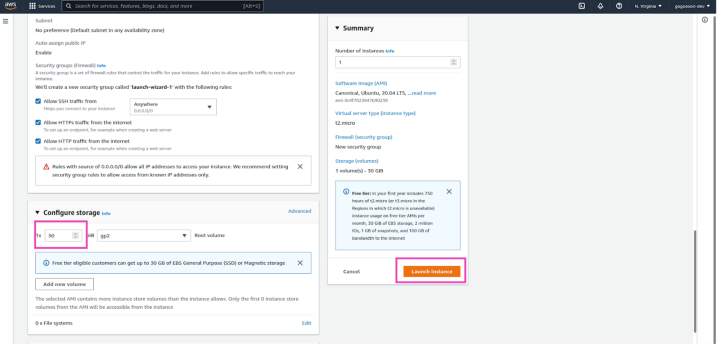
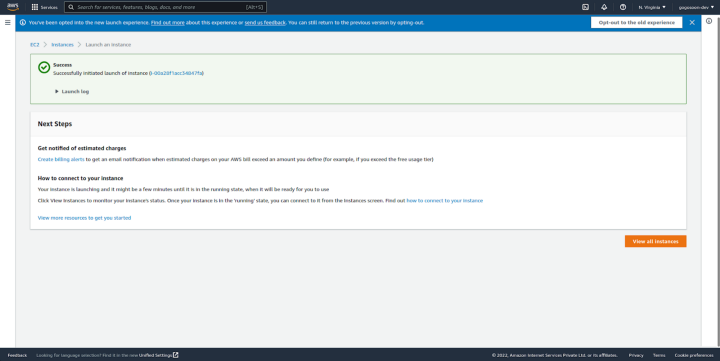
Step 6: Under Configure Store enter storage size as “30” and Click on Launch Instance.
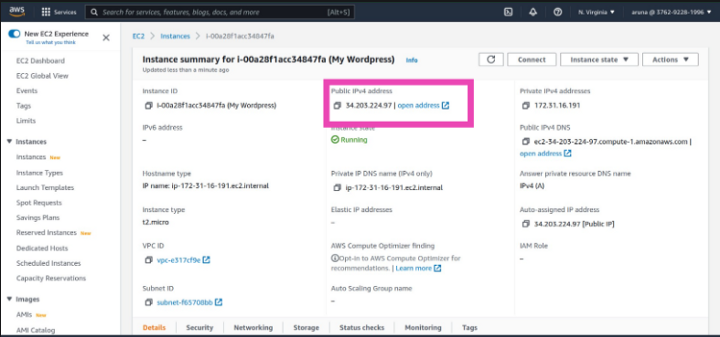
Step 7: Once the instance is launched you can see the instance status as running
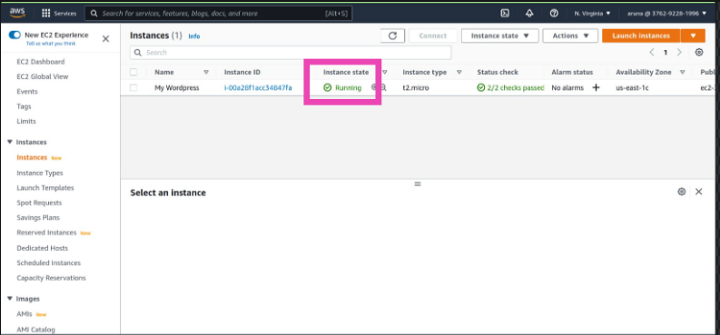
Step 8: Now click on the instance ID and copy the server IP address. To login into the server, an IP address is required
Great!🎉. Your Ubuntu instance has started🥳.
Login into AWS EC2 or Lightsail using SSH for Linux or Mac-based machines
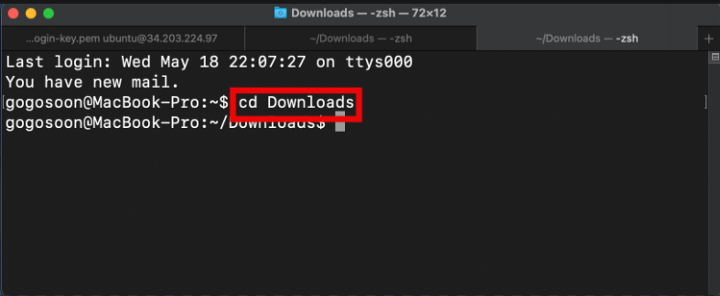
Step 1 : Open terminal and go to the path where you downloaded the .pem file . In my case I downloaded the file in downloads folder (cd /your/.pem/filepath)
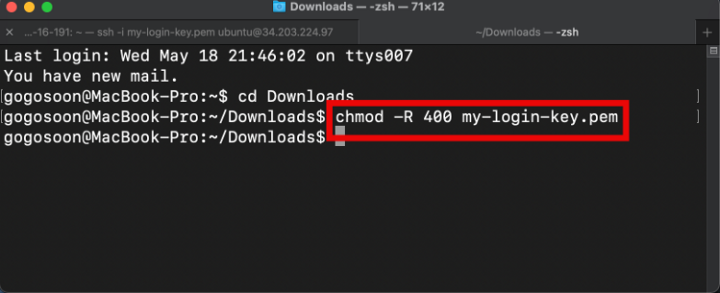
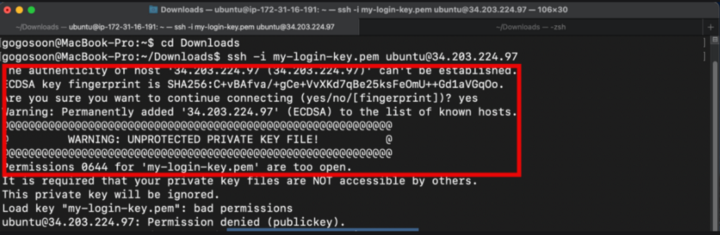
Step 2: Now you should provide permission for your .pem file. To do that type chmod -R 400 my-login-key.pem. Otherwise you will get “UNPROTECTED PRIVATE KEY FILE!” , bad permissions error.
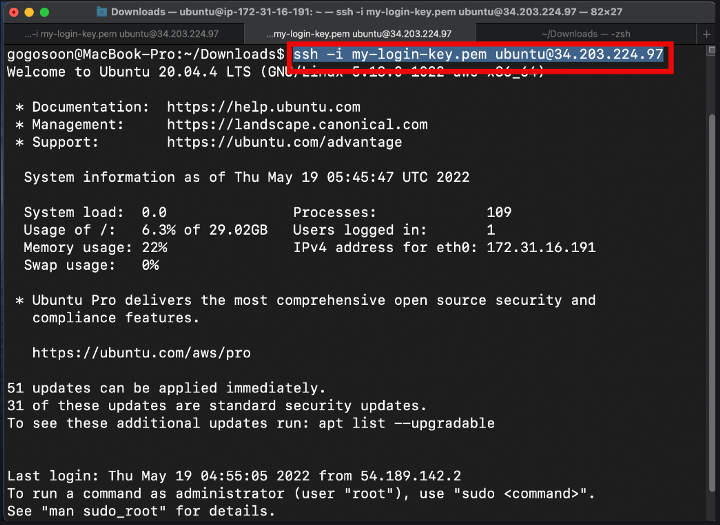
Step 3 : To login into server type ssh -i your.pemfilename ubuntu@ipaddress
a. Yourpem.file -> your .pem file name
b. Ipaddress -> your server ip address (IP address you have copied in Aws console)
Login into AWS EC2 or Lightsail using SSH for a windows machine
Step 1: To login into the EC2 machine from windows, putty is required. Download putty
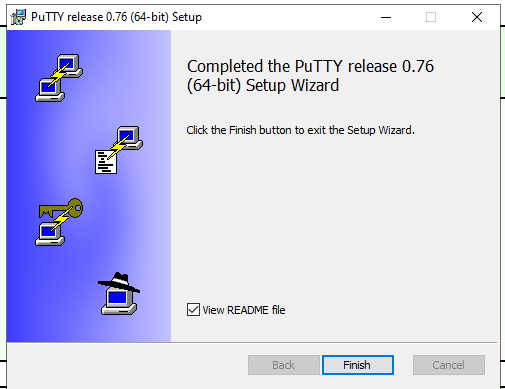
Step 2: Once the executable file is downloaded. Double-click on the .exe file and click next next to complete the installation.
Step 3: To login server using putty, first you need to convert .pem file into .ppk file
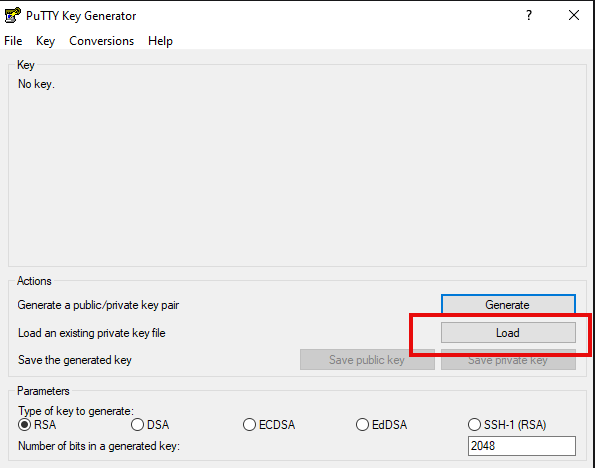
- Once you install the PuTTY on your machine, you can easily run PuTTYgen. For the same, go to Windows -> Start Menu -> All Programs -> PuTTYgen.
- You will see the PuTTY key generator dialog box on your screen.
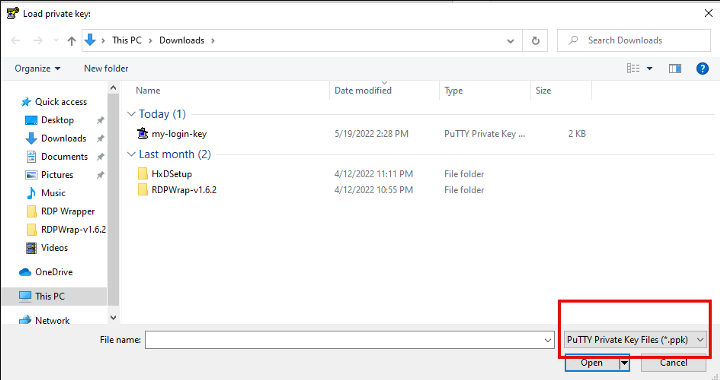
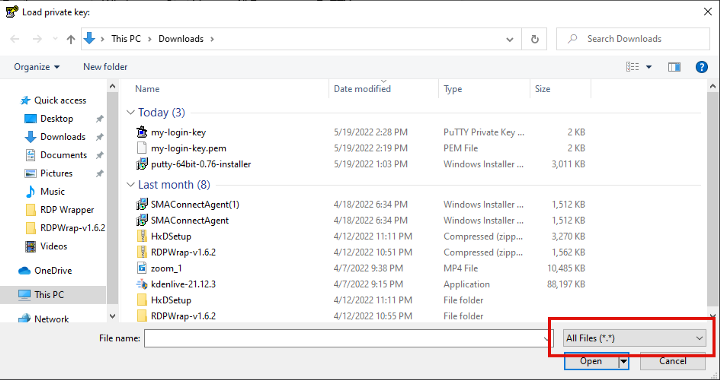
- Click on Load button, a dialogue box will ask you to select .pem file. In that dialogue box change .ppk files to all files and select the .pem file and then click open button
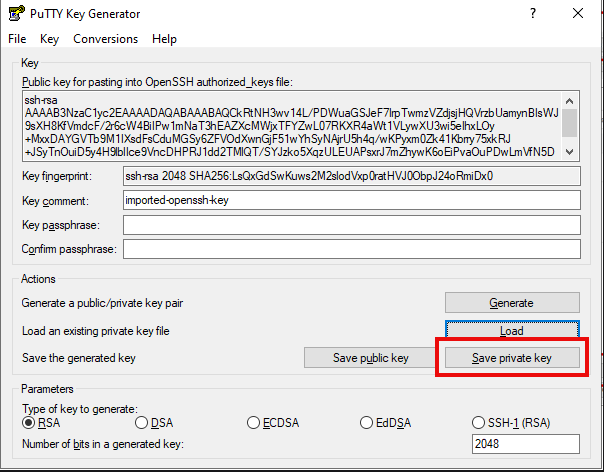
Step:4 Now you will see the below dialog box -> click Save private key. The file will be saved as .ppk file
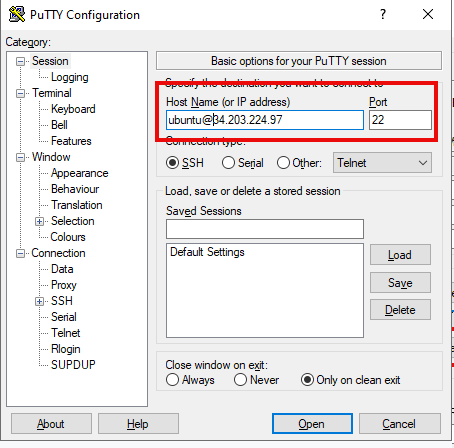
Step 5: Now open windows->Putty and do the following steps to login into EC2 or lightsail server
- In the hostname, input box enter your username@ipaddress. Eg: [email protected]
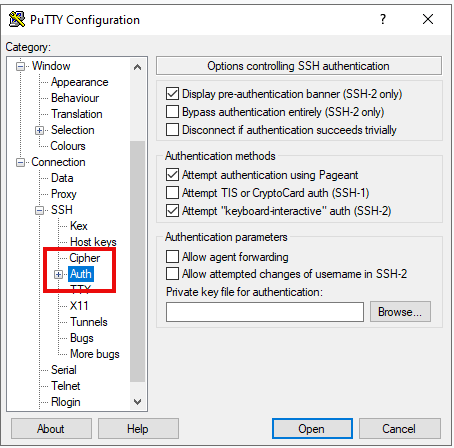
2. Now select SSH in the sidebar Category->Connection->SSH->Auth
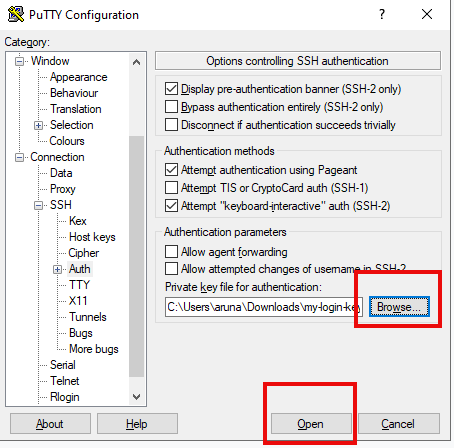
3. In the right side panel click the Browse button and select the .ppk file that you have generated in step 4 and click the open button
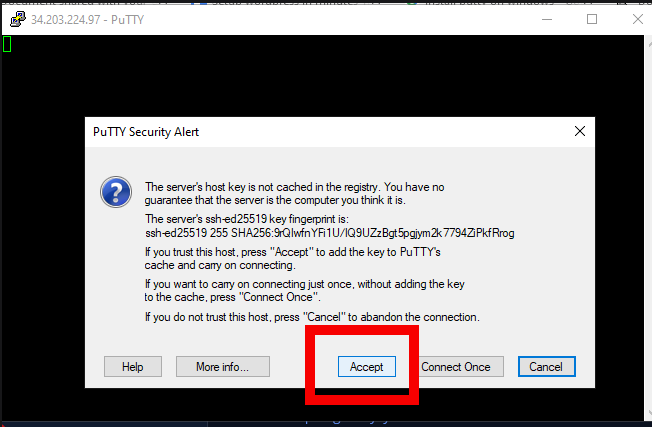
4. If the below screen prompts click Accept and continue
5. If you did everything right you will see the below terminal
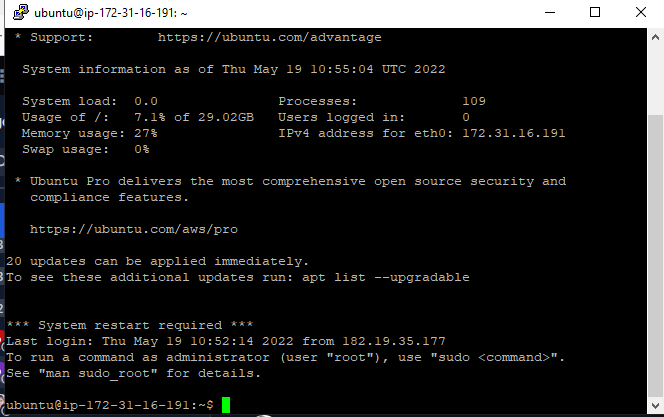
Congratulations🎉!, you successfully logged on to Ec2 or Lightsail server. Nice work 😃
Next Steps :
If you are going to create a WordPress site, you can use GoGoSoon Scripts. It helps you avoid common WordPress errors and helps you install WordPress in 1 minute by executing a single command.
Other related articles :